How to Get Rid of Food Traps Quickly and Easily
In this article, I am going to show you how to eliminate those annoying food traps that patients complain about in a very fast and efficient way. I am also going to share with you my step-by-step process that helps you determine and analyze areas that your patient wasn’t even aware of.
Patient H
Patient H is a young man with no medical concerns. At a routine examination, H complains about a nagging dull pain coming from the lower right. He reports that he often gets meat stuck there and has to “really dig” to get it out. Exam revealed an open contact between lower right first molar and lower right second bicuspid, with food impaction and tissue swelling. Radiograph taken showed localized bone loss in same area, caused by H’s inability to remove all plaque despite his efforts. H says that, lately, he has even avoided going out for dinner with clients as he is embarrassed by this issue and finds himself trying to “pick it out” in front of his clients.
Food Impaction & Flossing
Food impaction is a common complaint and many people are not aware of the consequences of leaving this problem untreated. Food impaction can result in bone loss, periodontal pockets, inflammation, pain, decay, and is a frequent source of irritation for many patients. One of the most obvious tests that we, as dentists, can do to quickly assess these areas is to check the contact in the area that the patient complains about. Here is what to look for:
- If floss goes through the contact very loosely and easily, you have an open contact.
- If floss shreds or rips, it’s likely that there is a piece of tooth or filling that’s chipped or broken, and this can result in food getting trapped and causing irritation.
- If floss feels normal (like the contact is closed) on the way down but then feels looser on the way out, then you likely have a portion of the contact open in the area where the floss feels looser, and that will contribute to food getting impacted.
- If floss does not feel like you have a solid contact through either down or out placement and you feel looseness at any point, it is likely that you have a portion of tooth or filling that is either under-contoured or contains a small concavity, which is an area that food and plaque can easily adhere to and become very difficult for the patient to remove.

Imaging
There is an additional step that we, as dentists, need to take in order to not only ensure our patient’s best oral health, but to also pro-actively diagnose additional areas where a problem is occurring or beginning to develop. In a case where a patient already complains of a food trap, I will go through the steps above in order to assess and determine the size of the food trap as well as all the consequences resulting from it. I will discuss not only the current issues including discomfort, tissue swelling, decay possibility, irritation, bone loss, I will also go over the long-term consequences of not treating it. Once the patient understands the urgency and need for treatment (steps outlined below), I then proceed to examine the remaining radiographs in order to look for additional areas that may be present. Here are the key elements to look for:
- Visible space between adjacent teeth or fillings (inter-proximally); any space on a radiograph should be checked with floss to confirm (see Figures 1 & 2)
- Flash or excess restorative material, including composite, adhesive, or cement (see Figure 3)
- Any chipped filling or tooth structure inter-proximally
- Any concavity in either filling or tooth inter-proximally (see Figure 2)
- Any missing or under-contoured filling material resulting in a “trap” or uneven area where food or plaque can adhere to and would be difficult to remove
- Areas of calculus below the inter-proximal contact; these are rough and act as ledges which cause food debris and plaque to adhere to and create more food impaction
- Localized periodontal pockets which cannot be accessed by patient in order to keep clean (see Figures 3 & 4)
- Localized bone loss, which can be a result of previous chronic food impaction, or para-function (see Figures 3 & 4)

Closing Contacts
All of the above findings can contribute to food impaction and, if found, patient should be questioned thoroughly to assess if they have noticed food gathering in those areas as well. Many times, when I ask the patient, “Do you get food getting stuck between these teeth?” and point to areas where any of the above are diagnosed, the patient very often responds: “Yes! I do! How did you know?” That allows for a more thorough discussion regarding closing all contacts and restoring all problem areas at once rather than waiting until bigger issues develop. Most patients find the food impaction a nuisance and many complain about the discomfort associated with it and, as a result, they are very motivated to restore all the areas diagnosed.
Instant Relief
The results of closing the contacts and restoring any chipping, flash, or poorly-contoured areas are instant and rewarding. As soon as the areas are restored, the patient no longer suffers from food impaction and its related irritation, and can feel instant relief from the treatment delivered. Here is the exact step-by-step process to close contacts and get rid of food traps quickly and easily:
Step 1: Place Rubber Dam with clamp and secure against leakage (see Figure 5). **For those who like to fustigate and find flaws, please note that I am very well aware of the open gap along the canine, which was well monitored throughout the entire procedure and no leakage occurred.
Step 2: Prepare teeth for restoration.
Step 3: Place matrix of appropriate size (Figure 6), and slide wedge of appropriate size to secure the band in place (Figure 7). You may need to use your finger to hold the band in place while placing the wedge.
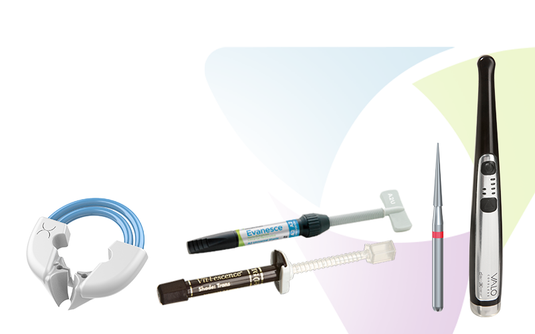
Step 4: Place selected Garrison® ring with forceps and ensure full seat (see Figure 8). The ring is placed with the loop of the ring toward or away from the forceps (depending on how the clinician chooses to restore), gripping it in the notch of the forceps and squeezing the forceps to open the ring slightly in order to place where needed down over the wedge. Once seated, the ring squeezes the teeth gently, causing slight separation so that the restorative material can then be placed in the correct contour and three-dimensional place in order to ensure a tight, positive contact with the adjacent tooth.

Step 5: Follow your adhesive protocols and, if using a flowable restorative material, place it where needed and light-cure (Figure 9). Composite resin is then added in the proximal area first and light-cured. Once the proximal contact is created, additional composite is then added in order to finish the restoration.
If restoring a number of teeth at the same time, multiple rings can be used for efficiency and speed.
Step 6: Once cured, the ring, band, and wedge can be removed (Figure 10). Note that very little flash or excess resin remains with proper band and ring placement and the restoration can be polished quickly. The proximal contact is then checked and confirmed resulting in elimination of the food trap, and its related consequences.
That’s it. That’s all there is to it. Super easy and very rewarding. And the best part is that you can get the same results instantly by following this step-by-step process.
About the Author

Agatha Bis, DDS
Dr. Agatha Bis, DDS practices in Oakville, Ontario, Canada. Dr. Bis received her Doctor of Dental Surgery degree from University of Western Ontario in 1996, and her Bachelor of Science from University of Toronto in 1992. With years of clinical experience and thousands of hours in post-graduate
training, her unique focus and expertise in treating Temporo-Mandibular Joint Disorder and comprehensive restorative dentistry, along with the use of digital technology, has led to developing exceptional systems to diagnosis and treatment planning, helping chronic pain patients treat their unresolved jaw pain, migraines and headaches.
Discover More
This article was originally published in the Clinical Life™ magazine: Spring 2024 edition
Clinical Life™ magazine is a premier periodical publication by Clinical Research Dental Supplies & Services Inc. Discover compelling clinical cases from Canadian and US dental professionals, cutting-edge techniques, product insights, and continuing education events.
Access previous publications, request print editions, or subscribe to our Newsletter now. Join our thriving dental professional community and take your practice to new heights!

