Occlusal Onlays? Simple!
Special instruments. Simple preparation.
The Innovative Alternative to Crowns
Reduce the Risk of Pulpitis
Whether it is a case of occlusal caries or premolars and molars damaged by bruxism and/or biocorrosion, occlusal onlays greatly reduce the trauma caused by the grinding of the site and fitting the restoration and, therefore, reduce the risk of pulpitis.
Discover Komet instruments that are developed for success with occlusal onlays and follow the sequence of preparation steps for success with the procedure:
Occlusal Onlays: Step-by-Step Procedure
1. Pre-Preparation
According to the manufacturers, occlusal onlays made of lithium disilicate require a minimum thickness of at least 1 mm. Teeth damaged by biocorrosion often have an irregular shape. It is therefore recommended to unite the steps of depth marking and pre-contouring in a pre-preparation process.
- Prepare guide grooves with the depth marker.
- Then even out the occlusal surface, making sure to maintain the correct cusp-fossa relationship.
2. Occlusal Contouring & Finishing
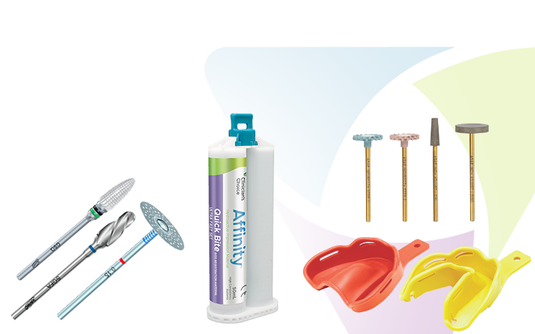
The centre of the occlusal surface needs to have a concave shape, whereas the area of the former cusps should have a convex shape to optimally support the occlusal onlay. Since none of the previously existing abrasive instruments were able to create such a special shape, Komet developed brand new occlusal abrasive cutters to this end, the so-called OccluShapers (370). These are the first instruments to be able to combine both shapes. To ensure that the abrasive instruments match the occlusal surfaces of each tooth, the OccluShapers are available in two sizes, one for molars and another one for premolars. To complete the range, Komet have added finishers of matching shape (8370).
For occlusal contouring, prepare the occlusal surface with an OccluShaper of suitable size in a mesio-distal direction, along the central fissure. Repeat with the finisher of the same size and congruent shape.
370.FG.030 for contouring premolars and 370.FG.035 for contouring molars
8370.FG.030 for finishing premolars and 8370.FG.035 for finishing molars
3. Buccal - Lingual Sides
To give the ceramic restoration stability, the lateral surfaces on the buccal & lingual sides have to be intact and of sufficient size. Komet's 8849P has an ideal length-diameter ratio and a guide pin at the front end of the instrument. Thanks to its special diameter, 8849P can also be used during the first step as a finisher with a controlled penetration depth. 8849P hardly vibrates, making the procedure more comfortable for a patient and an operator.
- Prepare the buccal and lingual surfaces as deeply as the guide lets you and as close to the interproximal area without touching the adjacent teeth.
- Can be used during the first step as a finisher with controlled penetration depth.
4. Separation & Finishing
Slim separation instruments allow interproximal preparation in the dental enamel.
- Prepare the interproximal region with the separating instrument 858 in an axial direction, protecting the adjacent tooth with a tension-free matrix strip and without extending the preparation.
- Next, smooth the interproximal surface with a finisher of matching shape 8858 in preparation for impression taking and production of the restoration.
- To finish the treatment, connect the buccal and lingual preparations in all four transitional regions with the finisher 8856 - and you're done!


