

Simple Concepts to Shape and Polish Anterior Composite to Rival Porcelain
With contemporary direct composite systems, now the clinician can truly be a dental artist by conservatively and esthetically creating restorations that are so lifelike that they virtually emulate the beauty of natural tooth structure.
However, rehabilitating or enhancing a smile with direct composite resins can be challenging. The task not only requires an understanding of the intricacies of shade and color selection, but also a mastery of replicating the uniqueness of natural tooth morphology and surface texture of the composite restoration. It could be debated that the most important aspect of any dental restoration is its unique morphologic shape, since a restoration with the correct anatomic shape and texture will seamlessly blend into the dentition even if there are some small shade disparities.
By essentially using only a few simple instruments and regimentally following an established work-flow of finishing and polishing, it is possible to predictably convert this morphologic concept of unique morphological shapes into reality.
Primary Tooth Anatomy
Primary tooth anatomy simply defines the geometric shape or outline of the tooth and usually falls into three categories: Square, triangular and ovoid.
Transitional Line Angles
There are three transitional line angles in maxillary anterior teeth that represent the area of transition between the two proximal surfaces and incisal surface with the facial surface. Altering the distance between the two proximal line angles gives the illusion of making the tooth appear wider or narrower. The proximal transitional line angles also influence the size of the facial embrasures.
Point Angles
Point angles are the junctions of the two proximal transitional line angles with the incisal facial line angle. The point angles determine the size of the incisal embrasures, where in esthetically oriented maxillary anterior teeth grow, larger away from the midline.
Secondary Tooth Anatomy
Secondary tooth anatomy is the result of normal tooth development and refers to the facial depressions and undulations commonly found in maxillary anterior teeth that give rise to the facial contours and accentuate the facial lobes.
Tertiary Anatomy
Suggested armamentarium for creating tooth anatomy and finishing composite resins that virtually mimic natural teeth are:
ANTERIOR COMPOSITE FINISHING WORKFLOW
Suggested armamentarium for creating tooth anatomy and finishing composite resins that virtually mimic natural teeth are:
- Abrasive discs
- Fine diamond burs
- Aluminum oxide finishing cups and discs
- Diamond impregnated A.S.A.P.® polishers and brushes and cotton wheel and aluminum oxide polishing paste
Optimal finishing and polishing a composite restoration is probably the number one secret for a seamless integration of the restoration into the native dentition, especially when restoring a single tooth.
The technique described here is a very simple procedure the clinician can use to achieve a very lifelike tooth appearance, with only subtle modifications necessary from patient to patient due to the variability of natural human tooth anatomy and luster of the native enamel.
STEP 1
Once the last layer of resin has been light cured, use a coarse-grit abrasive disc followed by a medium-grit disc (such as Contours™ Finishing Discs from Clinician’s Choice®, Sof-Lex™ Discs from 3M or FlexiDisc™ from Cosmedent) (Fig. 1) to develop the primary anatomy of the tooth based on proximal and cavo-surface line angles outlined in pencil on the restoration and adjacent tooth. Properly contour the following:
- Incisal edge position
- Three facial planes
- Location of the proximal line angles
- Location of the point angles
- Determine how open or closed the facial and incisal embrasures are
- Use a sharp pencil to visualize and if needed to modify or move the location of the proximal line angles with the finishing discs
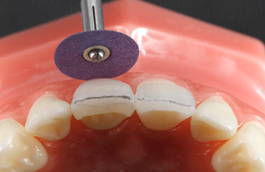
FIG. 1
Primary anatomy is outlined on the restored tooth as well as adjacent tooth. Abrasive discs such as coarse Contours Finishing and Polishing Discs (Clinicians Choice) to move the proximal line angles in or out in order to match the adjacent tooth. The established inciso-facial line angle is left outlined in order to guard against accidental modification while establishing secondary anatomy. Larger diameter discs are preferred for this broader surface adjustment.
It is very important to keep in mind that the proximal line angles, point angles, facial embrasures, and incisal embrasures all influence the appearance of the tooth and are dependent on one another.
STEP 2
Once the primary anatomy has been obtained with the use of rotating discs, the secondary anatomy can be developed.
A very effective method of placing secondary anatomy in a tooth is to visualize it first by drawing the locations onto the tooth with a pencil.
Once the areas have been identified, use a single flame-shaped fine diamond bur (I use the Brasseler F8888.31.012) to create the depressions and at the same time accentuate the proximal/middle developmental lobes. (Fig. 2)
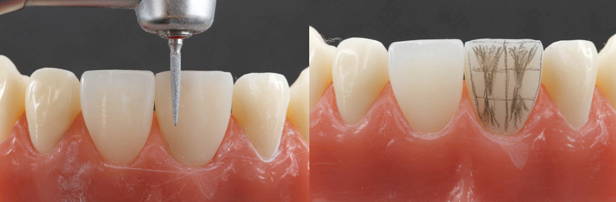
FIG. 2
Once the desired secondary anatomy is drawn onto the facial surface, a fine flame-shaped diamond (F8888.31.012 Brassler USA) is used to create the depressions. Care must be taken to avoid altering the facio-lingual line angle also outlined in pencil.
A series of 90 micron aluminum oxide diamond impregnated set of rubber points and cups (Contours™ Course Anatomy Trimmers from Clinician’s Choice® or Astropol from Ivoclar Vivadent) with water can be used to smooth out any surface irregularities and/or scratches left by the fine diamond flame shape bur to create a subtle, naturally flowing appearance of the secondary anatomy. (Fig. 3)
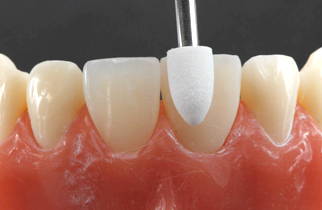
FIG. 3
90 micron aluminum oxide polishing points and cups (Contours Coarse Anatomy Trimmers, Clinicians Choice) are used to gently remove surface scratches left behind by the diamond bur and soften the lobes and facial depressions.
STEP 3
The anatomy and scratches can be further refined with the 44 micron purple A.S.A.P.® Pre-polisher and 6 micron A.S.A.P.® Final Hi-shine Polisher (diamond impregnated A.S.A.P. polishers) as these are very effective in accessing intricate parts of teeth without degrading the anatomy. (Fig 4)
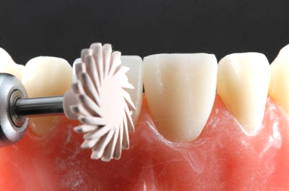
FIG. 4
A 2-step diamond polishing system (A.S.A.P., Clinicians Choice) is used to establish a high natural polish. The purple pre-polisher removes the last of the surface irregularities while the peach final polisher brings out a high gloss luster, all in literally seconds. These wheels are especially kind to the gingiva in case of accidental contact.
The use of edible silver glitter (available at most cake-decorating establishments) is a quick and effective way to verify the anatomy and ensure that all scratches are removed. (Fig. 5)
After applying the glitter with a makeup brush, silver glitter will quickly show areas that need additional smoothing or blending of the surface texture for a restoration that appears natural.
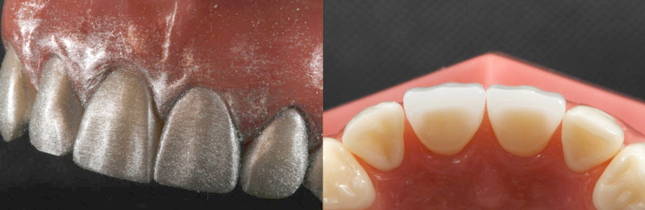
FIG. 5
Edible cake glitter, applied liberally to the facial surfaces of the restoration and surrounding dentition, is used to evaluate the surface anatomy and verify the removal of all surface irregularities.
STEP 4
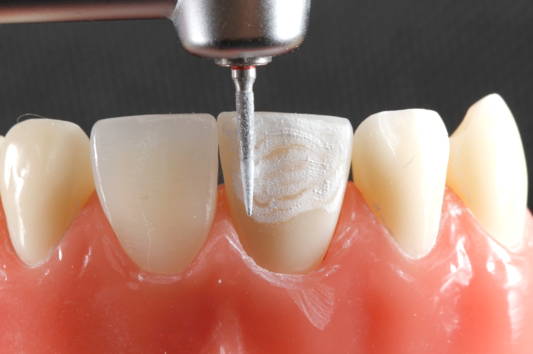
FIG. 6
Tertiary anatomy in the form of perikymata can be established with the use of a fine flame-shaped diamond bur (F888, Brasseler USA) at stall-out speed.
Tertiary anatomy generally presents in the form of perikymata or surface stippling that may or may not be present depending on the genetic variation of the patient or the age of the tooth. These characteristics are erased by the friction of mastication forces over time. Perikymata can be very simply placed by running a fine diamond bur at stall-out speed with an air turbine, or using an electric handpiece such as a Bien-Air EVO system at a very low RPM, in a mesiodistal direction on the facial surface. (Fig. 6) Surface stippling, on the other hand, can be placed with a fine football high-speed diamond bur using a pecking motion on the facial surface where this effect is desired.
STEP 5
The final polish will depend on the desired degree of luster or that which matches the native dentition if restoring only a single tooth. It is paramount to adhere to this workflow and as the fine natural anatomy created thus far can be easily erased with the overuse of abrasives polishing.
A lower surface luster can be achieved by using any silicone-impregnated brush with aluminum oxide paste (Enamelize™ from Cosmedent) over the entire surface of the composite resin. If a very high degree of luster is desired, a cotton wheel along with the aluminum oxide polishing paste will give a shine that rivals the highest natural luster of enamel that exists.
Conclusion
The systematic approach described here can simplify the understanding of each morphologic component of maxillary anterior teeth. Armed with this knowledge, the clinician can use the procedure and tools discussed to create anterior composite restorations that mimic the beauty of natural tooth structure.
Case Protocol
The key to any successful clinical treatment protocol is to “ALWAYS” follow a consistent workflow for time efficiency and for a predictable outcome every time.
Primary Anatomy
- Identify the primary anatomy (geometric outline of the tooth) and location of the line angles of the restoration after the last layer of composite has been polymerized by marking them with a pencil.
- Using only abrasive discs and nothing else, adjust the line angles and primary anatomy until they are properly developed.
Secondary Anatomy
- Mark the desired location of the secondary anatomy (depressions and lobes) on the restoration with a pencil.
- Place the depressions with a fine grit flame shape diamond bur in the areas on the restoration previously marked with the pencil.
- Soften the secondary anatomy created by the fine diamond bur with diamond impregnated rubber points/discs such as Course Anatomy Trimmers or A.S.A.P. Diamond Polishing Wheels.
- Place a final high shine using aluminum oxide paste such as Enamelize and a cotton buff wheel.
Tertiary Anatomy
- If tertiary anatomy (perikymata) is to be recreated it can be done with the same flame shaped fine diamond bur with a mesial-distal movement across the entire facial surface of the composite restoration at stall out speed.
- Soften the tertiary anatomy created by the fine diamond bur with gentle pressure using the A.S.A.P. Polishing Wheels.
- Place a final high shine using aluminum oxide paste such as Enamelize and a cotton buff wheel.
Case Report
Here is an actual case done with only 3 shades of Evanesce™ (Clinician’s Choice®) in the maxillary left central incisor on a young patient with lots of secondary and tertiary tooth anatomy demonstrating this composite’s adequate opacity allowing for the hiding the fracture line, strength as a nano-hybrid and excellent long-term polish-ability. The optical, handling and physical properties of Evanesce for these reasons are simply amazing as seen in this case.
- Enamel Incisal-lingual shell (60% opacity)
- A1 Dentin (90% opacity)
- B1 Enamel (80% opacity)
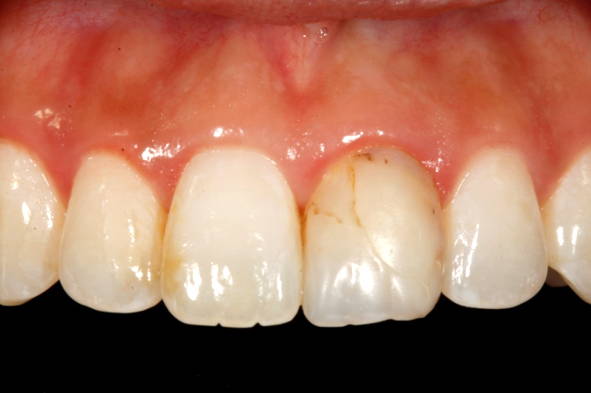
FIG. 7
Patient presented with a history of repeated failures of a Class IV composite restoration on Tooth #9.

FIG. 8
All previous composite is removed from tooth #9 revealing a lower height of contour in the gingival 1/3 in addition to missing incisal 1/3 tooth structure, essentially creating a veneer preparation.
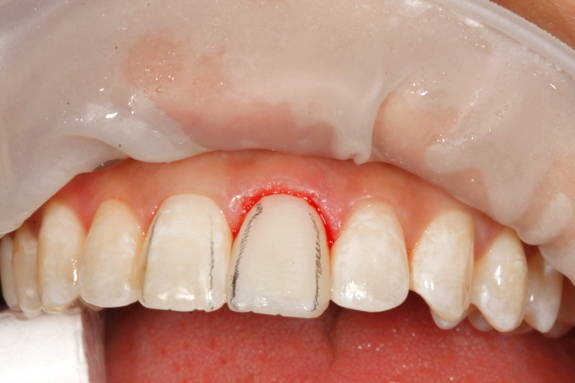
FIG. 9
Tooth #9 restored utilizing a lingual and buccal matrix and a layering technique consisting of one dentin and 2 enamel opacities of Evanesce composite (Clinicians Choice). Careful attention was paid to establishing incisal and proximal translucencies. Primary, secondary and tertiary anatomy was identified using pencil outlines and subsequently enhanced using the Anterior Composite Workflow described in the adjoining article
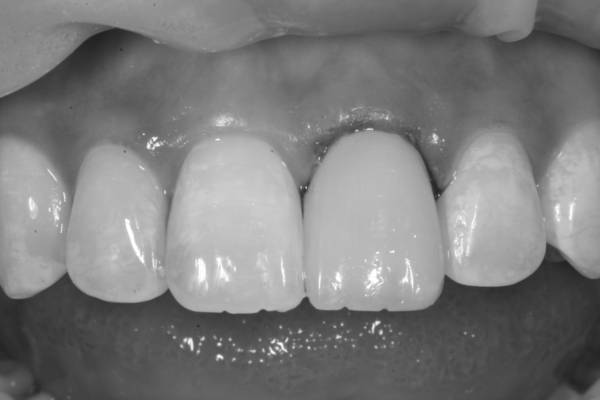
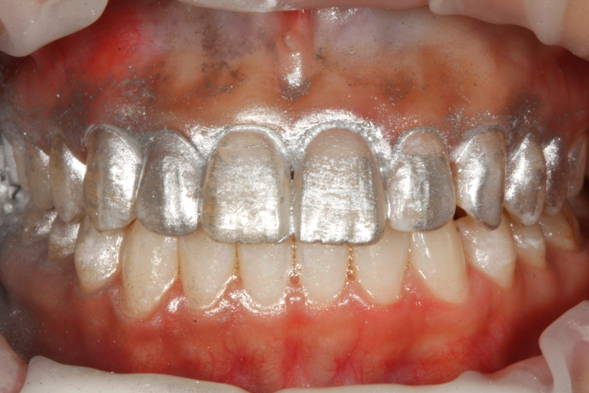
FIG. 10
Black and white imaging, along with glitter, is essential to verify the value and surface anatomy of the new restoration (tooth #9) matches that of the surrounding dentition.
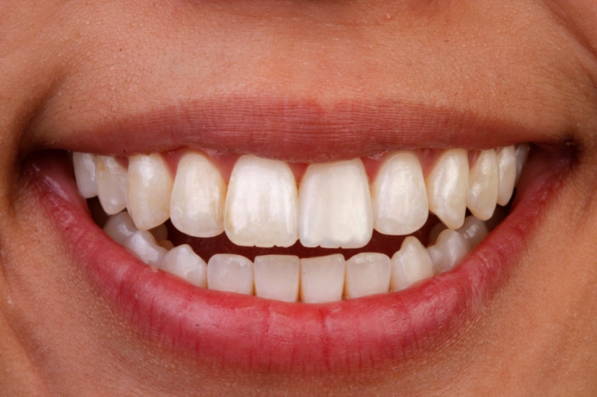
FIG. 11
Final restoration showing the successful replication of shade, opacity, and facial and incisal anatomy made possible with the shades and opacities available as well as the handling and optical qualities of Evanesce Universal Composite.
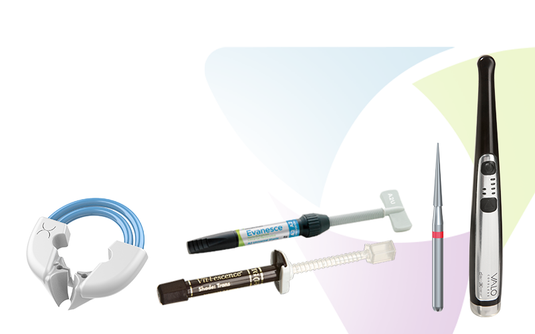
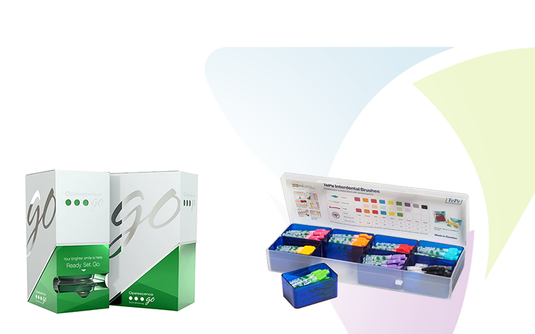
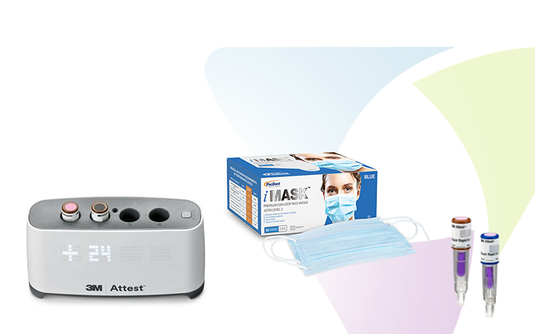
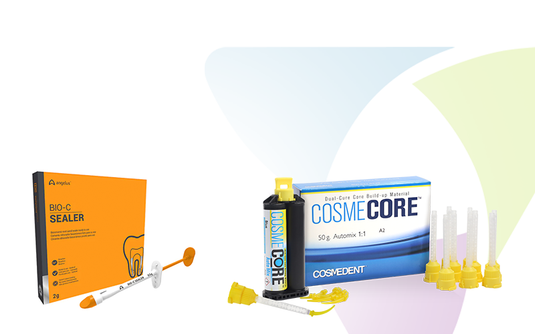
Featured Products
About the Author

David Chan, DMD, AAACD
AACD President and Accredited Member, David K. Chan, DMD, AAACD, was inaugurated as President of the American Academy of Cosmetic Dentistry (AACD) on April 21, 2021, during the AACD’s second ever virtual annual membership meeting.
Dr. Chan earned his DMD degree in 1989 from Oregon Health Sciences University. He maintains a full-time practice focused on cosmetic and comprehensive dentistry located in Ridgefield, Washington. Dr. Chan is a director at the Center for Dental Artistry and a Clinical Instructor at the Kois Center in Seattle, Washington. He is an Accredited member of the AACD and has been published widely in peer-reviewed dental articles, including several articles in the prestigious AACD Journal of Cosmetic Dentistry
Discover More
This article was originally published in the Clinical Life™ magazine: Spring 2021 edition
Clinical Life™ magazine is a premier periodical publication by Clinical Research Dental Supplies & Services Inc. Discover compelling clinical cases from Canadian and US dental professionals, cutting-edge techniques, product insights, and continuing education events.
Subscribe to our emails to get more articles like this and be notified about our exclusive promotions.